
I asked my younger sister what movie scene she’d like to build with me, and she said, “That scene you know with all the boats and the dragons from How To Train Your Dragon was pretty cool!”
And I said, “How about something that’s not the size of my entire bedroom?”
So we built the scene where Hiccup first makes friends with Toothless. I recommend listening to the soundtrack as you join me for a glimpse behind the scenes!

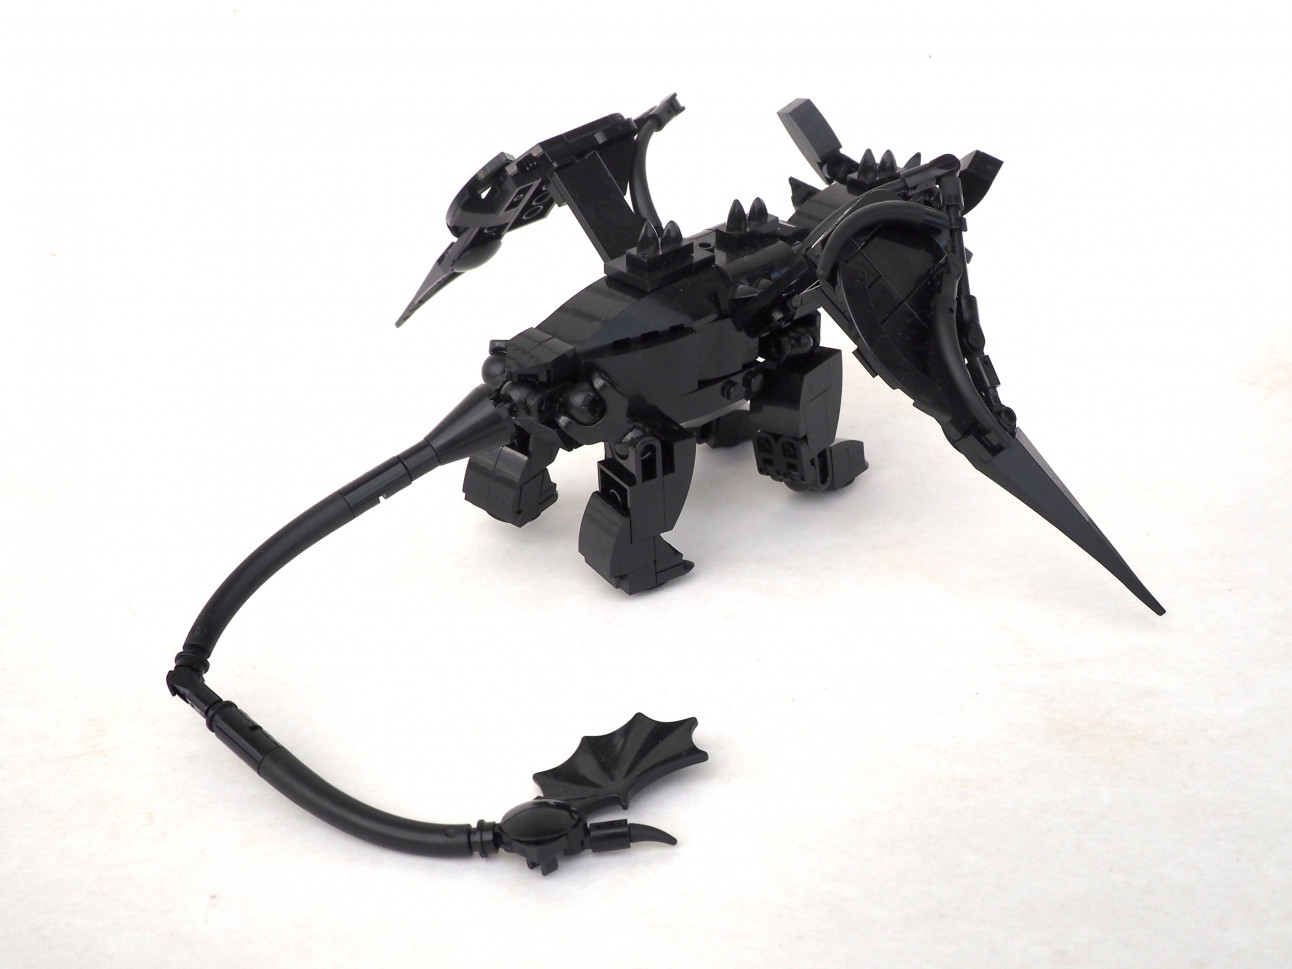
We started by building Toothless. I’m a huge admire of Jayfa’s design for Toothless, and although I don’t have a lot of the parts he used, I did keep the same scale and imitated his head design–though I’m guessing mine is a lot less sturdy inside than his was!
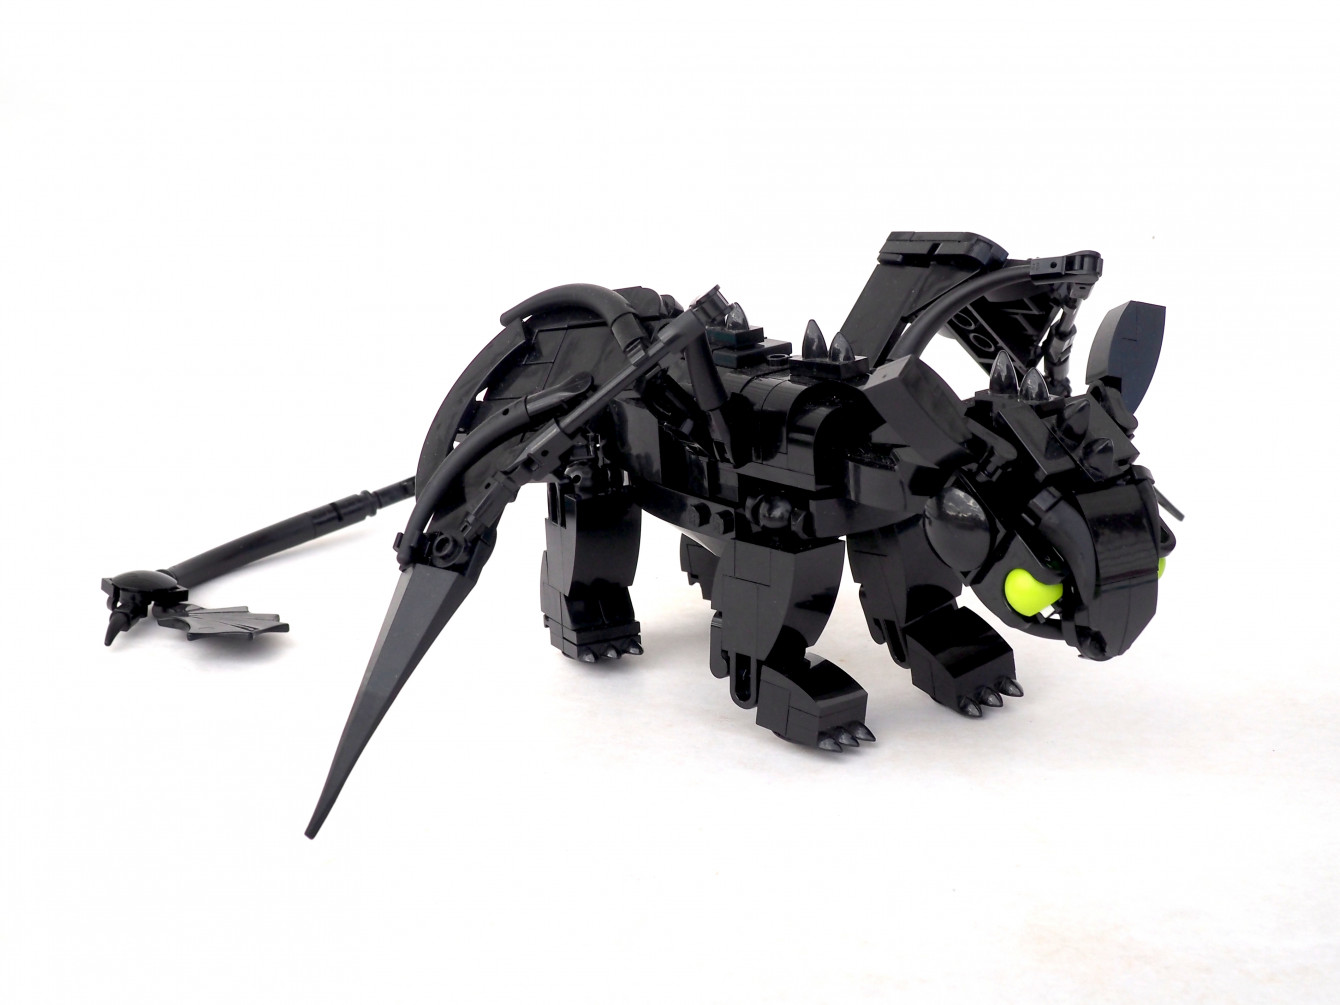
Some things that had to change specifically because of this shot were the bending wings and the bent tail. Other things had to change because I didn’t have the right parts–like the legs. Still other things changed just because there are limits to the amount of time I want to stare at someone else’s build to try to figure out the internals!
The dragon looks little, but appearances are deceitful–it needed a massive scene in order to fit comfortably! The rocks are a couple dozen studs of sideways bricks high, and the landscaping used up all my sand green plates and most of my brothers’!

There’s a lot going on for the lighting here, including butter dishes and granola boxes. I decided to shoot indoors so I could get the reflection I wanted on the rocks. My sister built this sunset. I planned to have it going the other way, but I tried both directions. In the end, I don’t actually know which way it was turned for the picture I actually used!

This rockwork technique came from Eli Willsea. And what do you know, they really do slinky.

Such fun!

But more fun after you’ve got the pictures safe… just in case.
The next thing to do was edit the photos. I took 6-15 pictures at each of two different angles. Some of the photos had the light on, and some off. I wanted the rocks to look really far away, so I didn’t want the sunset glare to hit the grass. And I wanted the rocks to look really big, so I didn’t want the glare to reach all the way across.
I ended up with two composite pictures. This first one has a softer glare, a slightly straighter angle, and more even soft light throughout.

This next picture has a harder glare pretty much wherever you look. While I like the brightness of the reflection on the rocks, it’s more than the original scene had. And the glare in other places (like Toothless’ ear) was messing things up for me.

So I decided to work with the first of these two pictures. I edited in the water (including a reflection of the back rocks), adjusted the placement of the back rocks and added some blur, added a bit of blur in the foreground, and lost myself several times in half a dozen copies of near-identical layers, trying to figure out which one of them had the straight unblurred line that was bugging me!
The final result at least met my expectations, and maybe exceeded them!

If you enjoyed this look behind the scenes, you might also enjoy these other articles:

What do you think?